How to get which version of the .net framework SDK is running

In the bad old world before .net core/v4 I was struggling to figure out how to return the version of the .net framework code was using. This is my best effort so far. NB Assumes you’re references System.Core;

var references = System.Reflection.Assembly.GetExecutingAssembly().GetReferencedAssemblies();
var core = references.FirstOrDefault(r => r.Name == "System.Core");
var sdkVersion = core.Version.ToString();

Myths of Agile

This is a post I’ve promised to write for a while, this isn’t a critic of ‘Agile’ in any of its guises but simply a guide to avoid incorrect statements.

Before I dive into this, let’s just remind ourselves of the Agile Manifesto;

Individuals and interactions over processes and tools
Working software over comprehensive documentation
Customer collaboration over contract negotiation
Responding to change over following a plan

That is, while there is value in the items on
the right, we value the items on the left more

Sprints therefore I’m Agile

A Sprint is essentially a time-box, nothing more nothing less. How the time-box is used depends on the team’s implementation. I’ve seen Sprints used to simply slice up months of development. Whilst I suspect that this practice is not uncommon I think most people would recognise a Sprint from definition popularised by the Agile strategy, getting close to process, of Scrum. Here a Sprint is typically used to create a small deliverable. There are many good reasons for this; quick feedback, leave in a deliverable state, focused priority based development, etc. However, a Sprint neither makes a development Agile nor it is necessary to be Agile. I say again, Sprint != Agile and Agile does not need Sprints.

Velocity will lead to predictable delivery

Another concept popularised by Scrum is that of a team’s Velocity. By attaching a notional cost to each item we deliver we can measure how long (or fast) a team takes to deliver them. Once we have the teams Velocity then we make better predictions about future deliveries. Once again I’m not going to judge the merits, or otherwise, of Velocity but I would like to point out the assumptions;

Velocity measurement is more accurate when you;

a) Retain the same team from Sprint to Sprint

b) The uncertainty/complexity of the tasks remains constant

When the team changes then Velocity becomes very suspect. How significant the change is will depend on the team changes but you need to be aware that it will affect the measurement.

Uncertainty/Complexity have always been the bugbear of software development and it is still true when using Velocity. Consider the concepts of Cynefin (taken from the excellent summary Agile Development and Retrospective Coherence)

clip_image001

Velocity is more useful when the tasks are in the ‘Order’ domains. These are the tasks that we fully understand regardless of if they are easy or complicated to implement. However, anything outside of that becomes an unknown. I.e. if your last Sprint was Ordered then you will have a velocity of O, but if your next Sprint in Complex then you are likely to have a very different velocity of C. This means that for the third Sprint your Velocity is (?)… O, C, O+C/2, etc. We cannot even say that all complex Sprints are always C. If you consciously look out for Complex tasks then you can mitigate them by converting them, as much as possible, to the Order domain via non-deliverable Spikes. In this strategy you honour the goal of velocity in the sense of knowing what will be soon be started, but not necessarily about stating how much you can deliver for any given future milestone.

Be warned, Velocity can be useful but it can also be very misleading. If you do choose to measure velocity then use it wisely.

Burn-down charts accurately show the state of the project

Another popular mechanism with Agile development is the Burn Down Chart. The premise is simple, start the graph with showing the amount of work to be done, and as the work is completed the graph will tend towards zero, i.e. the development has completed. However, in my experience this rarely shows an accurate view of the development. The problem is that teams do not stick with the items in a Sprint. Often other items creep in, be it additional features or bugs. Nothing wrong this, after-all we should be expecting change (not wishing to start a discussion about using the size of Sprint to mitigate this). The problem is that it is now very difficult to discern from old or new work. If the burn-down chart is a flat line is that telling you that you haven’t completed any work or that the input of work has matched the output? Whilst I’m struggling not to criticize Burn-Down charts it would remise not to mention Burn-Up charts that provide the same information but can also resolve this confusion. See Pawel Brodzinski’s excellent review of the issues.

Scrum or Kanban

This post has mentioned Scrum a few times, and there can be no denying its popularity with Agile devotees. Another popular strategy is that of Kanban. I have read a number of conversations that take the form of Scrum vs. Kanban and offer them up as a polar choice. Essentially Kanban is about assessing your current process and smoothing it out. If your current process, oh dear I’ve said process, is Scrum then you can apply Kanban to it. It’s not one or the other. In reality, if your development suits Kanban then over a period of re-assessment then you may find that many of the Scrum stages are also causing your bottlenecks and you will end up dissolving some of them, including Sprints. However, again that is not the conclusion of using Kanban, it is one possible outcome. It all depends on what best suits your particular issues.


Summary

I’ve had these conversations a number of times, so I hope other people will find it useful. When something is Agile, look back to the manifesto and evaluate the rationale. If it doesn’t help you with those goals then challenge why you should be using it.

Could not load type ‘WebPages.Global’

Another in my ‘reminder’ series. I had a very strange error when running a web site; Could not load type ‘WebPages.Global’.

I realised that my problem is related to the way I prefer to create my projects. I like to have a single bin that my projects drop their DLLs in. I like to share that bin folder with my web sites. In this case I was using a new machine and had forgotten to create the file join to enable the sharing. I.e. as far as the web site was concerned there was nothing in the bin folder. A quick join later and we’re back in business.

Easy theming with Windows Phone

Easy theming with Windows Phone

Windows Phone has the concept of Dark and Light themes. I really like this idea as I typically have my phone in Dark theme and switch to Light when in bright sunshine. Unfortunately not a lot of applications make use of these themes so I wanted to share the method I use to implement it.

The basics

The idea is to provide your designer, or at least the one within, with a nice clean separation of Light and Dark styles.

clip_image001

Figure 1 Basic file structure

Here we can see the three main components; Dark.xaml, Light.xaml and Master.xaml. Let’s first look at the output so you can see the type of changes you can make. Obviously I’m being garish to exaggerate the difference, and normally I’d be more subtle 🙂 />

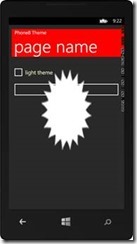
clip_image003clip_image005

As you can see the explosion is white in the Dark theme and yellow in Light. Also the background brush in the header is red and sky blue for Dark and Light respectively. Essentially any style is available to change. So what have I changed to create this lovely theme sensitive UI?

Example Theme Xaml

Dark;

<ResourceDictionary
xmlns="http://schemas.microsoft.com/winfx/2006/xaml/presentation"
xmlns:x="http://schemas.microsoft.com/winfx/2006/xaml">
<SolidColorBrush x:Key="AppBackgroundBrush" Color="Red"/>
<SolidColorBrush x:Key="AppForegroundBrush" Color="#FFFBFFC9"/>
<Color x:Key="PhoneForegroundColor">#FF6E1919</Color>
<SolidColorBrush x:Key="PhoneForegroundBrush" Color="{StaticResource PhoneForegroundColor}"/>
<ImageBrush x:Key="ImageBrushBackground" ImageSource="/Background.png"/>
</ResourceDictionary>  

Light;

<ResourceDictionary
xmlns="http://schemas.microsoft.com/winfx/2006/xaml/presentation"
xmlns:x="http://schemas.microsoft.com/winfx/2006/xaml">
<SolidColorBrush x:Key="AppBackgroundBrush" Color="SkyBlue"/>
<SolidColorBrush x:Key="AppForegroundBrush" Color="#FF303026"/>
<Color x:Key="PhoneForegroundColor">#FFF5F908</Color>
<SolidColorBrush x:Key="PhoneForegroundBrush" Color="{StaticResource PhoneForegroundColor}"/>
<ImageBrush x:Key="ImageBrushBackground" ImageSource="/BackgroundLight.png"/>
</ResourceDictionary> 

The idea is that you use the same resource keys and change the underlying value to suite the theme. For example, we can see that the ImageSource for ImageBrushBackground is different for each theme.

How do you use the Theme files?

I owe the technique to a great post from IdentityMine, essentially you derive a new static resource type which loads the correct themed xaml *before* your page has started to load. I’ve wrapped this type in a separate component you can just reference and use. Rather than regurgitate the Identity Mine post I’ll explain how to use it, NB or you can just use the sample;

1. Create the Dark and Light xaml files as shown in Figure 1 Basic file structure

2. Add a reference to Pauliom.Theming.dll (or Pauliom.Phone8.Theming.dll)

3. Add a the Master.xaml to the Resources folder (change assembly as appropriate);
<ResourceDictionary xmlns=”http://schemas.microsoft.com/winfx/2006/xaml/presentation&#8221;

xmlns:x="http://schemas.microsoft.com/winfx/2006/xaml"
xmlns:local="clr-namespace:ThemingSample"
xmlns:Pauliom="clr-namespace:Pauliom.Theming;assembly=Pauliom.Theming">
<ResourceDictionary.MergedDictionaries>
<Pauliom:ThemeResourceDictionary Kind="Theme"/>
</ResourceDictionary.MergedDictionaries>
</ResourceDictionary> 

4. The role of the Master is to provide a single place to create a master theme concept, you don’t need to use it so long are you put the ThemeResouceDictionary somewhere in your projects MergedDictionaries

5. Change App.xaml to make the resources available anyway in project, ensure the following in App.xaml, the first reference to Dark is your default, it helps the editors/designers;

<Application.Resources>
<ResourceDictionary>
<ResourceDictionary.MergedDictionaries>
<ResourceDictionary Source="Themes/Dark.xaml"/>
<ResourceDictionary Source="Resources/Master.xaml"/>
</ResourceDictionary.MergedDictionaries>  

6. That is all you need, you are now free to reference those resource keys in the knowledge the changes to the underlying theme will be automatically routed to your specific themed file

The Sample

I hope you find this as useful as I do, and I hope it encourages more applications to use and react to themes. You can find the source and components at https://winphonetheme.codeplex.com

How to Test async and await

This is one of those, “please stop forgetting this dummy” posts aimed at myself. When you want to test an asynchronous method implemented via the Task-based Asynchronous Pattern (TAP) don’t forget to change the default test method;

Default:

[TestMethod]

public void TestAsyncCall() { … }

to

[TestMethod]

public async Task TestAsyncCall() { … }

Step-by-step guide to creating Pub Sub with NServiceBus

Recently I have been tasked with creating a prototype of an application using NServiceBus. However I found that the current documentation/samples can be a little difficult to follow. I’m guessing because a) it’s recently changed to v3 and some of the docs haven’t been upgraded b) when you “grow up” with a project it’s often difficult to remember what problems newbies will have. So I’ve decided to write this guide to help me remember and if it’s useful to anyone else then great. So here goes;

  1. Create a new project as a class library called ‘Messages’

  2. Add a class file called ‘MyEvent.cs’:

    using System;
    
    namespace Messages
    {
        public class MyEvent
        {
            public Guid EventId { get; set; }
        }
    }
    

  3. Create a new project as a class library called ‘Publisher’

  4. Add references to log4net.dll, NServiceBus.dll, NServiceBus.Core.dll, and NServiceBus.Host.exe (yes exe)

    if you installed using NUGet these will be in your package files, otherwise you’ll need to download NServiceBus and grab them from the install location’s binaries folder

  5. Add a project reference to ‘Messages’

  6. Add an app.config to the project

    This is configuring the queue where any messages that are deemed in error will go

     <?xml version="1.0" encoding="utf-8" ?>
    <configuration>
      <configSections>
        <section name="MessageForwardingInCaseOfFaultConfig" type="NServiceBus.Config.MessageForwardingInCaseOfFaultConfig, NServiceBus.Core" />
      </configSections>
    
      <MessageForwardingInCaseOfFaultConfig ErrorQueue="error"/>
    
      <runtime>
        <assemblyBinding xmlns="urn:schemas-microsoft-com:asm.v1">
          <dependentAssembly>
            <assemblyIdentity name="Common.Logging"
                              publicKeyToken="af08829b84f0328e"
                              culture="neutral" />
            <bindingRedirect oldVersion="1.2.0.0"
                             newVersion="2.0.0.0"/>
          </dependentAssembly>
        </assemblyBinding>
      </runtime>
    </configuration>

  7. Add a class files called ServerEndpoint.cs and TestPublisher.cs, we’ll add the code later

  8. Add a config file called NServiceBus.Host.exe.config

    This is configuring the queue that we’ll be publishing message to, the value must match the qualified class name of the publisher’s project configuration class, we’ll do that next

    <?xml version="1.0" encoding="utf-8" ?>
    <configuration>
      <appSettings>
        <add key="EndpointConfigurationType" value="Publisher.TestPublisherConfig, Publisher"/>
      </appSettings>
    </configuration>
    

  9. Now for the code in ServerEndpoint.cs

    The code uses an “ISupport” style to declare that it should be executed a bit like a console.main(). NSB uses injection to populate the bus property, so it will be available when Run() is executed

    using System;
    using NServiceBus;
    using Messages;
    
    namespace Publisher
    {
        public class ServerEndpoint : IWantToRunAtStartup
        {
            public IBus Bus { get; set; }
    
            public void Run()
            {            
                Console.WriteLine("Press 'Enter' to publish a message.To exit, Ctrl + C");
    
                while (Console.ReadLine() != null)
                {                
                    var eventMessage = new MyEvent();
                    eventMessage.EventId = Guid.NewGuid();
                    
                    Bus.Publish(eventMessage);
    
                    Console.WriteLine("Published event with Id {0}.", eventMessage.EventId);
                    Console.WriteLine("==========================================================================");
    
                }
            }
    
            public void Stop()
            {
    
            }
        }
    }
    

  10. Now to add the code for the core of the publisher code, ‘TestPublisher.cs’

    NSB likes to use the “ISupports” style, so here we can see the class explaining to NSB that it configures the endpoint, that it is a publisher and that NSB should call it as the endpoint starts. Inside the Init() it is explaining what types NSB should consider as implementing messages, i.e. our Messages dll.

    using System;
    using System.Collections.Generic;
    using System.Linq;
    using NServiceBus;
    
    namespace Publisher
    {
        public class TestPublisherConfig : IConfigureThisEndpoint, AsA_Publisher, IWantCustomInitialization
        {
            public void Init()
            {
                Configure.With()                
                    //this overrides the NServiceBus default convention of IEvent
                    .DefiningEventsAs(t => t.Namespace != null && t.Namespace.StartsWith("Messages"));
            }
        }    
    }
    

  11. Now we can move onto the subscriber, add a new project call ‘Subscriber’ as a class library
  12. Add the NSB references again, log4net.dll, NServiceBus.dll, NServiceBus.Core.dll, NServiceBus.Host.exe
  13. Add the project reference to ‘Messages’
  14. Add app.config file

    this will explain to NSB which messages we are listening for and where (the endpoint) to find them

    <?xml version="1.0" encoding="utf-8" ?>
    <configuration>
      <configSections>
        <section name="MessageForwardingInCaseOfFaultConfig" type="NServiceBus.Config.MessageForwardingInCaseOfFaultConfig, NServiceBus.Core" />
        <section name="UnicastBusConfig" type="NServiceBus.Config.UnicastBusConfig, NServiceBus.Core" />
      </configSections>
      
      <MessageForwardingInCaseOfFaultConfig ErrorQueue="error"/>
      <UnicastBusConfig>
        <MessageEndpointMappings>
          <add Messages="Messages" Endpoint="Publisher" />
        </MessageEndpointMappings>
      </UnicastBusConfig>
    
    </configuration>


  15. Add a class file ‘EndPointConfig.cs’

    this is almost the same as for the publisher but notice is says AsA_Server this time rather than AsA_Publisher

    using System;
    using System.Collections.Generic;
    using System.Linq;
    using System.Text;
    using NServiceBus;
    
    namespace Subscriber
    {
        public class EndPointConfig : IConfigureThisEndpoint, AsA_Server, IWantCustomInitialization
        {
            public void Init()
            {            
                    Configure.With()                
                    .DefiningEventsAs(t => t.Namespace != null && t.Namespace.StartsWith("Messages"));
            }
        }
    }


  16. now let’s add the final bit of code, the handler for the message. Create a class file ‘HandleMyEvent.cs’

    using System;
    using System.Collections.Generic;
    using System.Linq;
    using System.Text;
    using NServiceBus;
    using log4net;
    using Messages;
    
    namespace SubScriber
    {
        public class HandleMyEvent : IHandleMessages<MyEvent>
        {
            public void Handle(MyEvent message)
            {
                Logger.Info(string.Format("Subscriber received MyEvent with Id {0}.", message.EventId));            
                Console.WriteLine("==========================================================================");
            }
    
            private static readonly ILog Logger = LogManager.GetLogger(typeof(MyEvent));
        }
    }


  17. almost there. We now need to have something to run. The NServiceBus.Host.Exe is going to do all the work but we have to do a couple of things. First Build (don’t run) the whole solution. Since we referenced the .exe this will be enough for Visual Studio to copy it to each project’s local bin folder
  18. For both Publisher and Subscriber open their projects and set the Debug->Start External Program to bin the NServiceBus.Host.Exe in their respective Debug\bin folders
  19. Now ensure they will both run by right clicking on the Solution and ‘Set Statup Projects…’. Ensure that both Publisher and Subscriber are ticked and Multiple Projects is selected
  20. Now run the solution and press enter in the Publisher. You should see the messages sent to the subscriber
  21. You can now add additional subscribers in exactly the same way, just be sure to correctly rename their namespaces to avoid clashes, NSB doesn’t like that
  22. That should be it. You can find out more about NServiceBus from the site documentation and the community group. Just be careful as when I wrote this some of the documentation is old and I found that confusing. I hope this was useful

IIS does not list a web site that matches the launched URL?

For the second time in as many weeks I was caught out by the following error message;

—————————
Microsoft Visual Studio
—————————
Unable to start debugging on the web server. IIS does not list a web site that matches the launched URL.

Click Help for more information.
—————————
OK   Help  
—————————

Probably like many other developers I do not have the time to track down the specific nature of the necessary security requirements. So my advice…start Visual Studio as Administrator. Yes I know it’s naughty, but life’s too short.

Poor mans ORM

Recently I’ve been looking at and hearing about data abstraction code that basically just calls a stored procedure and populates an objects on the way back. No identity management, just a simple mapper. I thought about using AutoMapper but as an intellectual exercise I wanted to see how easy (or not) it was to write a single helper that could move data from the stored procedure to an object based on convention. Here is the result;

public TCollection Load<TCollection, TItem>(string procedureName, params object[] arguments) where TCollection : IList
{
  this.connectionString = ConfigurationManager.ConnectionStrings["MyProject"].ConnectionString;
  TCollection instance = (TCollection)Activator.CreateInstance(typeof(TCollection));
  IList list = instance as IList;
  if (list == null)
  {
    throw new ArgumentOutOfRangeException("procedureName");
  }
  procedureName = "mySchema." + procedureName;
  using (SqlDataReader reader = ExecuteProcedure(procedureName, arguments))
  {
    while (reader.Read())
    {
      TItem item = (TItem)Activator.CreateInstance(typeof(TItem));
      for (int i = 0; i < reader.FieldCount; i++ )
      {
        string fieldName = reader.GetName(i);
        object value = reader[i];
        SetValue(item, fieldName, value);
        list.Add(item);
      }
    }
  }
  return instance;
}

The code assumes you’ll be getting objects representing lists of something <TCollection,TItem> and that the properties match the result set columns. The ExecuteProcedure command takes the arguments and maps them to the stored procedure arguments, easy enough to write. The SetValue is a little more involved;

private static void SetValue(object instance, string propertyName, object value)
{
  Type type = instance.GetType();
  PropertyInfo property = type.GetProperty(propertyName);
  var descriptor = TypeDescriptor.GetProperties(instance)[propertyName];
  TypeConverter converter = descriptor.Converter;
  if (converter != null)
  {
    property.SetValue(instance, converter.ConvertFrom(value), null);
  }
  else
  {
    property.SetValue(instance, value, null);
  }
}
  

The code uses standard reflection methods to set the property of the instance. The complication is the converter. If you are using a type that isn’t directly represented by a .net variant of a SQLType then you’ll need to use a converter. For example the following Id type needs its accompanying type converter (thanks to Chris Hannon)

public class MyItem
{
    [TypeConverter(typeof(MyIdTypeConverter))]
    public MyId Id { get; set; }
}
public class MyIdTypeConverter : TypeConverter
{
    public override object ConvertFrom(ITypeDescriptorContext context,
            System.Globalization.CultureInfo culture,
            object value)
  {
      if (value is int)
        return new MyId((int)value);
      else if (value is MyId)
        return value;
      return base.ConvertFrom(context, culture, value);
  }
}
 

So there you go, not eactly pain free but if you have a number of stored procedures and classes and you’re not overly worried about the performance hit of reflection then perhaps something like this will fit.

Poor mans composite UI or separating out controllers in MVC3

I was looking to create a simple composite UI style application in Microsoft MVC3. What I want is a host MVC application that will compose its UI from other Controllers and Views packaged in other DLLs. The concept comes from autonomous components and SOA where a service owns not only its traditional business services but all the data and almost-all of the UI.

I thought I would be overriding controller builders, adding configuration, etc, etc, but actually this “poor-mans” variant is very easy. Here are the steps I followed;

  1. Create your Host MVC3 web application (Host.proj), for the sake of this example choose the Internet application so you get the default HomeController
  2. Create your satellite MVC3 controller by creating a standard class library project, called Satellite.proj
  3. Add a reference in Satellite to System.Web.Mvc
  4. Create a controller for your satellite, say MyController. Add an ActionResult such as;
  5.  
    public class MyController : Controller 
    { 
      public ActionResult MyInformation() 
      {
        return View("MyInformation2");
      }
    } 
  6. Create the View folders for your controller in the Satellite project, e.g. Views\My\
  7. Now for linking them together. I just added a project reference from Host to Satellite in order to grab the DLL. The Views are slightly harder, I used a post build event in the Satellite such as; xcopy “$(ProjectDir)Views” “$(SolutionDir)Host\Views” /E /R /Y
  8. That’s it. Just add some code to use the controller, such as placing the following in the index view;
  9. @Html.Action("MyInformation","My")
    

    Edit: Note you get errors complaining that ‘there is no build provider registered for the extension’ you need add a dummy web.config to the project, follow these instructions;
    Using Razor in a class library